What to Fill Silicone Molds With: Creative Ideas for Every Project
Silicone molds have become a staple for crafters, bakers, and DIY enthusiasts due to their flexibility, durability, and non-stick properties. But figuring out what to fill silicone molds with can sometimes feel overwhelming. Whether you’re making desserts, crafts, or home decor, this guide will walk you through the best materials and techniques to maximize your silicone molds while avoiding common pitfalls.
1. Edible Creations: Perfect for Baking & Candy Making
Chocolate & Candy
Silicone molds are ideal for creating custom chocolates, candy melts, or gummy treats. Their heat-resistant design ensures easy release without cracking.
Pro Tip: Temper chocolate properly (melt to 88–90°F) for a glossy finish.
Avoid: Overfilling molds—use a piping bag for precision.
Baked Goods
From mini cakes to intricate cookie shapes, silicone molds work wonders. They’re oven-safe and distribute heat evenly.
Try: Brownie bites, madeleines, or flavored shortbread.
Hack: Lightly grease molds with butter for extra non-stick insurance.
Ice Cubes & Frozen Treats
Freeze fruit juice, coffee, or yogurt in silicone molds for fun-shaped popsicles or cocktail ice cubes.
2. Non-Edible Crafts: Unleash Your Creativity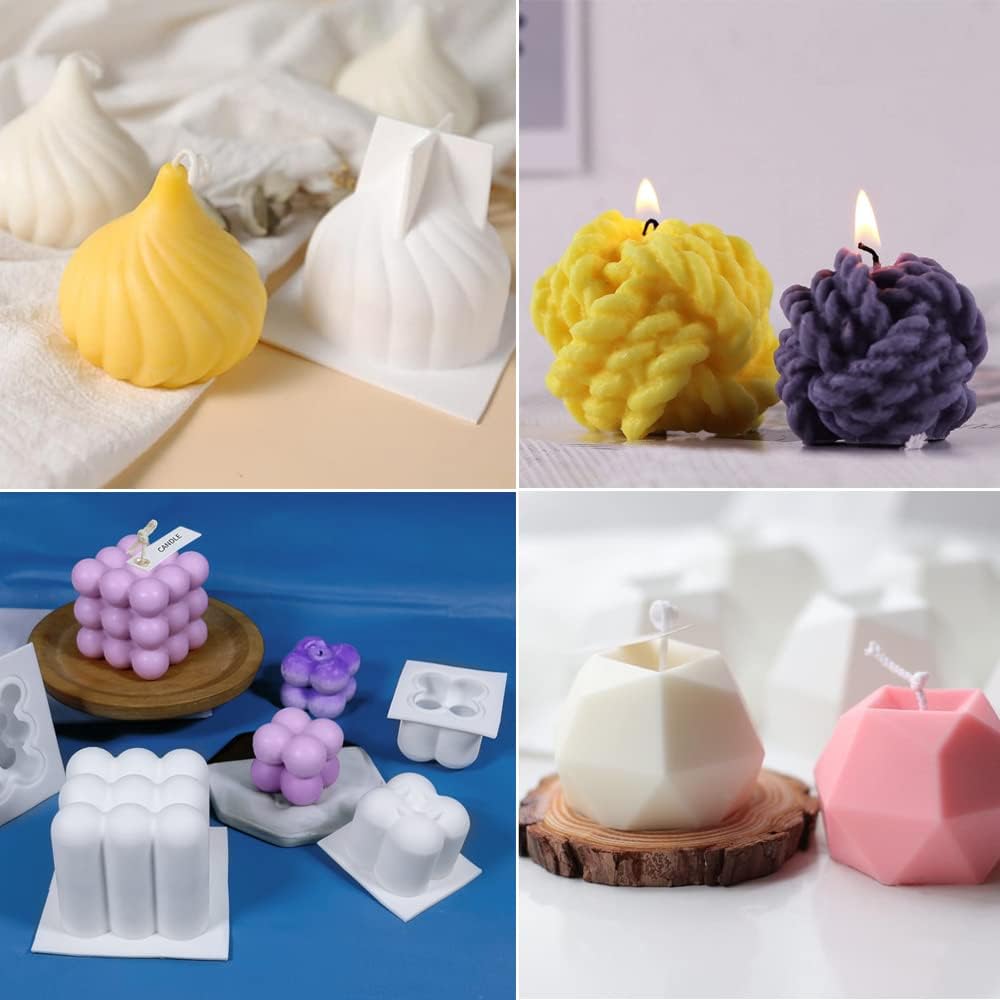
Candles
Use soy wax, beeswax, or paraffin to craft scented candles. Silicone’s flexibility makes releasing detailed designs (like florals or geometric shapes) effortless.
Safety First: Add fragrance oils after wax cools slightly to preserve scent integrity.
Soap & Bath Bombs
Cold-process soap or melt-and-pour bases pair perfectly with silicone molds. For bath bombs, pack the mixture tightly to prevent crumbling.
Pro Move: Spritz molds with rubbing alcohol to reduce air bubbles.
Resin Art
Epoxy resin is a top choice for jewelry, coasters, or decorative pieces.
Key Tip: Work in a well-ventilated area and mix resin thoroughly to avoid sticky results.
Avoid: Cheap resin brands—opt for UV-resistant options for longevity.
3. Practical Household Uses
Concrete or Plaster Decor
Craft planters, bookends, or garden ornaments using fast-setting concrete or plaster of Paris.
Time-Saver: Add acrylic fortifier to strengthen the mix and reduce curing time.
DIY Wax Melts
Repurpose leftover candle wax or mix soy wax with essential oils for custom wax melts.
Ice Packs
Fill molds with water and aloe vera gel for reusable, flexible ice packs.
4. Materials to Avoid in Sili cone Molds
While silicone is versatile, some materials can damage molds or create safety risks:
Hot Metals: Silicone isn’t rated for extreme heat (e.g., molten metal).
Acrylic Paint: It may stain or degrade molds over time—use mold-release spray first.
Certain Oils: Citrus-based oils can break down silicone.
Final Tips for Success
Prep Molds Properly: Wash new molds with warm soapy water to remove residues.
Temperature Control: Let hot materials (like resin or wax) cool slightly before pouring to prevent warping.
Storage: Keep molds flat to avoid distortion.


